Table of Contents
If you have plaster walls in your home that could use a fresh coat of paint, this project can completely transform the look and feel of a room.
Before you start painting, it's important to know the materials you'll need and the proper steps to prepare and paint your walls.
This article covers what plaster walls are, reasons to paint them, materials needed, preparation steps, painting steps, and maintenance tips for painted plaster walls. Let's start giving your walls a fresh new look!
Plaster walls are interior walls that have a smooth, durable finish created by applying plaster over a base material such as brick, wood, or metal. They provide a traditional and elegant look to rooms, commonly found in older homes and buildings.
Historically, plaster walls have been used for centuries to enhance the aesthetics of interior spaces. The application of plaster dates back to ancient civilizations such as the Egyptians and Greeks, showcasing the enduring appeal of this building material. Plaster walls offer various advantages, including excellent soundproofing qualities, fire resistance, and the ability to hide imperfections in the underlying structure. Different types of plaster, such as lime plaster and gypsum plaster, are utilized to achieve distinctive textures and finishes in interior design.
Painting plaster walls is essential to protect the underlying material, provide a decorative finish, and enhance the overall aesthetics of a room. It helps seal the surface, preventing moisture penetration, and adding a personal touch through color choices.
The act of applying fresh paint to plaster walls can completely transform the ambiance of a space, creating a sense of freshness and cleanliness. The tactile nature of plaster can also be highlighted with the right choice of paint, adding depth and texture to the walls.
In terms of maintenance, painted plaster walls are easier to clean and maintain compared to bare plaster, as they are less prone to dust accumulation and can withstand regular cleaning. The ability to customize the color and finish of painted walls allows for endless design possibilities, whether you prefer a bold statement color or a subtle, neutral hue.
Dig deeper: Can You Plaster Over Artex
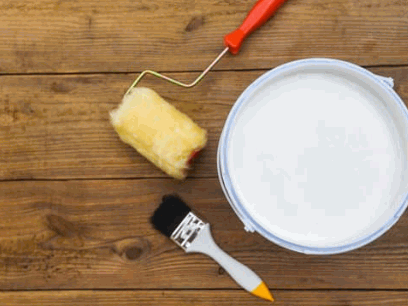
To paint plaster walls effectively, you will require essential materials such as high-quality paint, a suitable primer, sandpaper for surface preparation, painter's tape for clean lines, and appropriate paintbrushes or rollers for application.
Having a drop cloth or plastic sheeting to protect floors and furniture is crucial to avoid any accidental spills or drips. Proper ventilation in the room is also vital to ensure the paint fumes dissipate quickly.
Don't forget to have a bucket, stirring sticks, and a paint tray to facilitate the painting process. A caulk is handy for filling in any gaps or cracks before painting, while a sturdy ladder is necessary for reaching high areas.
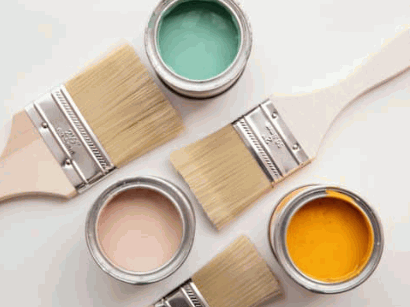
Selecting the right paint for your plaster walls is crucial as it determines the final color and finish of the room. Quality emulsion paints are popular choices for their durability and ease of application.
When choosing colors for your plaster walls, consider the room's lighting and size to create the desired atmosphere. Soft pastel hues like powder blue or peach can make a small room feel more spacious, while bold shades such as deep navy or emerald green add a touch of drama.
Priming new or dry plaster walls before painting is essential to ensure proper adhesion of the paint, improve coverage, and enhance durability. A high-quality primer helps seal the surface and promotes even paint absorption.
Using a primer on plaster walls not only prepares the surface for better paint adhesion but also helps in creating a uniform base for the paint to adhere to. There are different types of primers available, such as water-based, oil-based, and shellac-based primers, each suitable for specific wall conditions.
When applying primer on plaster walls, it is crucial to follow the manufacturer's instructions regarding drying times and proper application techniques. Properly primed walls not only result in a smoother paint finish but also prevent the paint from peeling or chipping over time.
Appropriate paintbrushes and rollers are essential tools for applying paint to plaster walls effectively. Quality brushes help in cutting sharp lines, while rollers ensure a smooth and even application of paint.
When dealing with plaster walls, it's crucial to select the right type of brushes and rollers to achieve the desired textures and finishes.
For creating intricate details or reaching tight corners, consider using angled brushes that provide precision and control. On the other hand, flat brushes are ideal for larger areas, ensuring efficient coverage. Similarly, when it comes to rollers, nap thickness plays a significant role in determining the smoothness of the paint application. A shorter nap is suitable for smoother surfaces, whereas a longer nap is preferred for textured plaster walls.
Using drop cloths or protective coverings is essential to safeguard floors, furniture, and other surfaces from paint drips or spills while painting plaster walls. They help maintain a clean and organized workspace.
Drop cloths serve as a barrier between the paint and delicate surfaces, preventing any accidental damage or staining. This simple yet effective tool can make a significant difference in the outcome of your painting project. By using a high-quality drop cloth, you can ensure that your floors and furniture remain unscathed, saving you time and money on potential repairs or replacements.
Moreover, drop cloths also aid in easy cleanup after the painting job is complete. Instead of spending hours scrubbing or trying to remove paint splatters, you can simply gather up the drop cloth and dispose of any paint residue safely. This not only speeds up the post-painting process but also reduces the risk of spreading paint in unwanted areas.
Prevention is always better than cure, and drop cloths embody this principle perfectly. A small investment in quality drop cloths can save you from the hassle of dealing with paint-related damages and ensure that your painting project runs smoothly from start to finish.
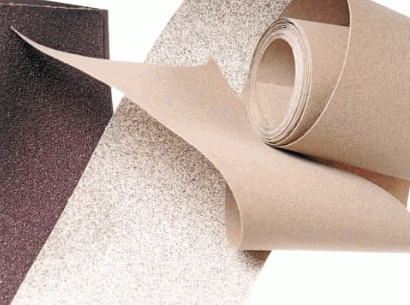
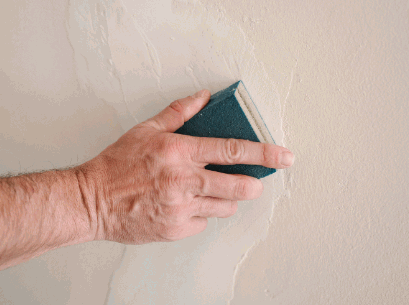
Sandpaper is essential for preparing plaster walls before painting by smoothing out imperfections, removing old paint residue, and creating a clean surface for paint adhesion. It helps in achieving a professional and flawless finish.
In terms of sandpaper grits, there are a variety of options available, ranging from coarse grits for initial rough sanding to fine grits for final smoothing. Sanding techniques play a crucial role in surface preparation. It is important to sand in the direction of the grain to avoid damaging the wall surface. Proper sanding not only improves the appearance of the walls but also ensures better paint adhesion, leading to a longer-lasting paint job. Investing time in correct sanding techniques can make a significant difference in the overall look and durability of your paint job.
Painter's tape is an essential tool for achieving clean and precise edges while painting plaster walls. It helps in creating straight lines, protecting adjacent surfaces, and ensuring a professional finish.
One of the main benefits of painter's tape is that it helps in achieving sharp edges, especially when working on intricate patterns or designs. By carefully applying the tape along the edges, painters can ensure that the paint stays exactly where they want it, resulting in crisp lines and clean transitions between colors.
Painter's tape plays a crucial role in preventing paint bleeding. When the tape is firmly pressed down, it forms a barrier that keeps the paint from seeping underneath, ultimately leading to a neat and polished look.

Properly preparing plaster walls before painting is crucial for a successful paint job. This includes cleaning the walls, repairing any damage, sanding to smooth surfaces, and applying a suitable primer for improved paint adhesion.
Before you start the cleaning process, make sure to protect the surrounding area with drop cloths or masking tape. Begin by removing any dust, dirt, or grease using a mild detergent solution and a sponge.
Next, assess the walls for any cracks, holes, or imperfections that need repairing. Use a high-quality patching compound to fill in these areas and allow it to dry completely.
Once the repairs are dry, it's time to sand the walls to create a smooth surface for painting. Use a fine-grit sandpaper or sanding block to gently sand the walls in circular motions, paying extra attention to any rough spots or edges.
Cleaning the plaster walls thoroughly is the first step in preparing them for painting. Remove dust, dirt, and any residues using a mild detergent solution and allow the walls to dry completely before proceeding.
Having a clean surface is crucial as it ensures proper adhesion of the new paint and a smooth finish. Removing any grime or debris is essential to prevent imperfections and peeling in the future. You can use a gentle scrubbing brush or sponge to work the detergent solution into the plaster, paying attention to any stubborn spots. Once the walls are cleaned, rinse them with clean water to remove any soap residue.

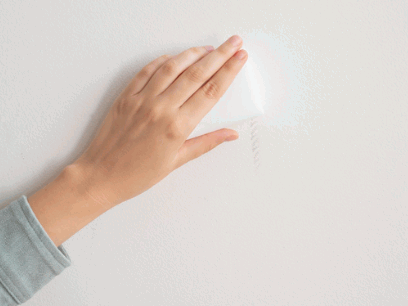
Inspect the plaster walls for any cracks, holes, or imperfections that require repair before painting. Use spackling paste or joint compound to fill in gaps, sand the patched areas smooth, and ensure a uniform surface.
After filling in the gaps and smoothing down the patched areas, it's vital to prime the repaired sections before applying fresh paint. This helps the new paint adhere properly, ensuring a professional and seamless finish.
Choosing the right primer for the specific plaster conditions is crucial in preventing further damage. It's also important to match the existing wall texture when applying the final coats of paint to achieve a cohesive look. Don't forget to allow sufficient drying time between each step to guarantee a durable and aesthetically pleasing result.
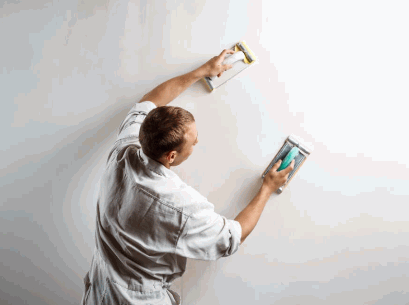
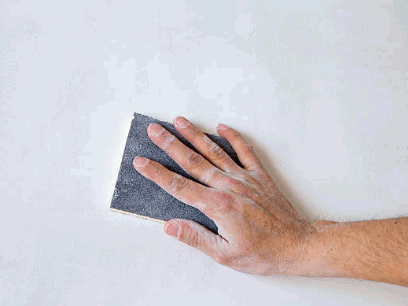
Sanding the plaster walls is essential to create a smooth and even surface for paint application. Use fine-grit sandpaper to remove rough patches, old paint residues, and imperfections, ensuring a flawless finish.
Proper sanding is the foundation of a successful painting project, as it not only enhances the appearance of the walls but also promotes better paint adhesion. To achieve the desired smoothness, start with coarser grit sandpaper and gradually move to finer grits for a polished result. It's crucial to sand in a consistent motion, moving in one direction to avoid swirl marks or uneven patches.
When selecting the sandpaper, consider the surface texture and the level of imperfections. For rough areas, opt for lower grit numbers, while higher numbers are suitable for smoother surfaces.
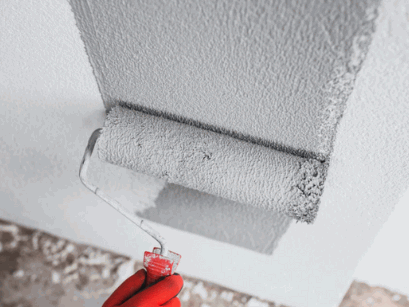
Priming the plaster walls is a critical step to promote paint adhesion and improve coverage. Choose a high-quality primer suitable for plaster surfaces, apply it evenly, and allow sufficient drying time before painting.
There are various types of primers available, such as water-based primers, which are easy to clean up and have low VOC content. On the other hand, oil-based primers are great for blocking stains and providing excellent adhesion. When applying the primer, use a roller for larger areas and a brush for detailed work, ensuring complete coverage. Priming helps seal porous surfaces, evens out the surface texture, and enhances the durability of the paint job, preventing peeling and flaking over time.
Painting plaster walls involves a series of steps to ensure a professional and long-lasting finish. From applying painter's tape to rolling on the paint and adding a second coat if needed, each step contributes to the overall appearance of the walls.
Before beginning the painting process, ensure that the walls are clean and dry, free from any dust or debris. A crucial step is priming the walls to create a smooth base for the paint to adhere to. Once the primer has dried, you can start applying the paint using even strokes to minimize streaks and achieve a uniform finish. When painting large areas, work in sections to maintain a consistent look. Remember to allow sufficient drying time between coats to prevent smudges or peeling. Inspect the walls for any touch-ups needed before stepping back and admiring your freshly painted plaster walls.
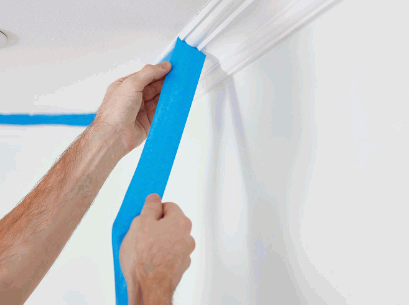
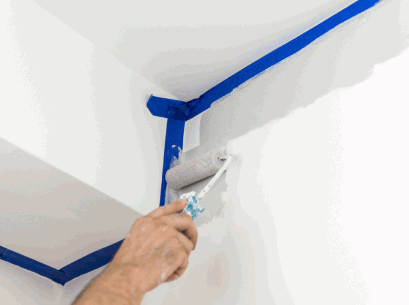
Before painting plaster walls, apply painter's tape along edges, corners, and areas that need protection. This helps in achieving clean lines and prevents paint from bleeding onto adjacent surfaces.
To ensure the painter's tape adheres properly, make sure the surface is clean and dry before application. Press down firmly along the edges of the tape to seal it against the wall securely. When painting, use a brush or roller perpendicular to the tape for a seamless finish. Remember, peeling off the tape while the paint is still wet will prevent any unwanted pulling or chipping once dried. Taking these additional steps will elevate the overall quality of your painting project.
Start by painting the corners and edges of the plaster walls with a brush for precision and detail. Ensure an even application, covering all nooks and crevices before moving on to the main wall surfaces.
Painting corners and edges can be a meticulous process that sets the foundation for the rest of the painting project. Using a smaller brush allows for controlled movements and the ability to navigate tight spaces with ease.
Focus on feathering the paint from the corner towards the center of the wall to achieve a seamless transition. It's crucial to maintain consistent pressure on the brush to avoid uneven coverage. Pay special attention to ensuring the edges are neatly defined and the corners are fully coated.
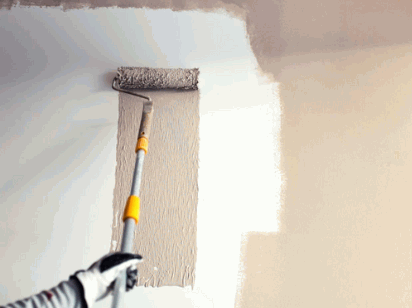
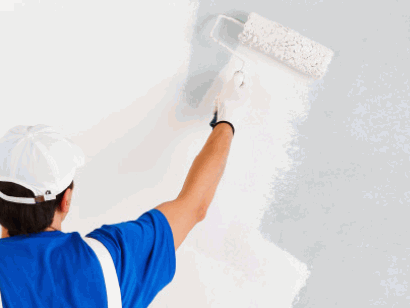
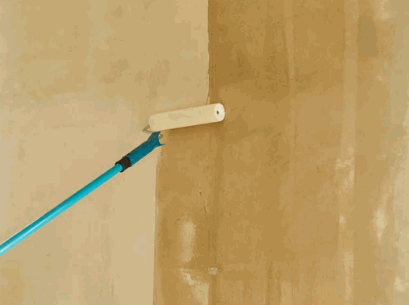
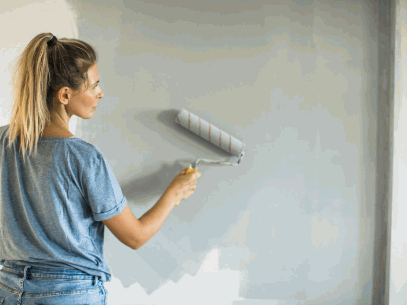
Using a paint roller, apply an even coat of paint on the plaster walls in smooth, overlapping strokes. Roll vertically and then horizontally to ensure complete coverage and a uniform finish across the entire surface.
Begin by loading the roller with an ample amount of paint from a tray, ensuring it is evenly distributed across the roller's surface. This helps avoid drips and inconsistencies in the application. As you roll the paint onto the plaster walls, maintain a steady pressure to create a seamless look. Remember to refill the roller frequently to prevent the paint from drying out and leaving streaks or patches. A consistent and methodical approach will result in a professionally painted wall with a smooth, flawless texture.
After the first coat of paint dries, assess the coverage and finish of the plaster walls. If needed, apply a second coat using the same technique for a more vibrant color, enhanced durability, and a professional result.
Applying a second coat of paint not only increases the richness of the chosen color but also provides an added layer of protection for the surface underneath. This additional coat helps to conceal any imperfections that might have been missed during the first application, ensuring a flawless appearance once the project is completed. The second coat can further enhance the overall aesthetic appeal of the walls, giving them a more polished and luxurious look.
Proper maintenance is essential to preserve the appearance and longevity of painted plaster walls. Regular cleaning, prompt repair of any damage, and timely touch-ups can extend the lifespan of the paint and keep the walls looking fresh.
In terms of cleaning painted plaster walls, it is important to use gentle methods to avoid damaging the delicate surface. Dusting regularly with a soft brush or microfiber cloth can help prevent dirt buildup. For tougher stains, a mild detergent solution and a soft sponge can be used, ensuring not to scrub too vigorously. Avoid abrasive cleaners or harsh chemicals as they can strip the paint and affect the texture of the plaster.
Repairing any cracks or chips promptly is crucial to prevent further damage. Fill small cracks with spackling compounds and smooth them out with a putty knife for a seamless finish. Larger damages may require professional help to ensure a proper repair. In terms of touch-ups, keeping a small amount of leftover paint for color-matching can make the process much easier and more effective.
Regular cleaning of painted plaster walls is crucial to remove dust, dirt, and stains that can accumulate over time. Use a mild detergent solution and a soft cloth to maintain the paint's appearance and cleanliness.
Ensuring a regular cleaning routine not only enhances the aesthetic appeal of your walls but also plays a significant role in extending the lifespan of the paint. By removing accumulated dirt and grime, you not only prevent the paint from looking dull but also safeguard it from potential damage. Utilizing a soft cloth and a gentle detergent ensures that the cleaning process is safe and effective without causing any harm to the paint's delicate finish. Proper wall maintenance can also help in avoiding the need for frequent repaints, saving you time and money in the long run.
Address any damage or wear on painted plaster walls promptly to prevent further deterioration. Use appropriate patching materials, touch-up paints, and techniques to restore the wall's appearance and integrity.
By addressing issues promptly and using the right repair methods, you can extend the life of your painted plaster walls and keep them looking fresh for years to come. The timely repair of cracks and chips is crucial to maintaining the structural integrity of the wall and preventing moisture infiltration that can lead to more extensive damage.
Periodically inspect painted plaster walls for signs of wear, fading, or damage, and touch up the paint as needed to keep the walls looking fresh and uniform. Matching the paint color and finish is essential for seamless touch-ups.
When embarking on a touch-up project, the first step is color matching. Using the original paint can or bringing a sample for custom matching ensures a cohesive look.
Application techniques play a crucial role in achieving a flawless finish. Proper tools like brushes or rollers, and knowing when to feather the edges for blending, are key. Consistency is key to maintaining a polished appearance, so it's important to address touch-ups promptly to prevent noticeable differences in shade. By following these steps, your plaster walls can retain their aesthetic appeal for years to come.